7 min read
kdb+ and Microsoft Azure
At Version 1, we believe in using the right technology for the job to deliver the best solution to our clients. Recently, we were tasked with storing and analysing multiple types of data within a single, logical application. Rather than attempt to force all data types into a single database technology, we looked at which technology was the most suitable for each type of data.
Amongst its vast range of solutions, Microsoft Azure offers lots of cloud-based platforms and hybrid storage options for objects, files, disks, queues, and tables. By using MS Azure Files, Blobs, and Cosmos DB alongside kdb+ we were able to produce a quick prototype that applied the right storage choice for each type of data. We used embedPy to interface kdb+ with these three separate Azure storage options and merged the results on retrieval to perform our analysis on the large, aggregated dataset.
We thought it might be useful to include the prototype code in the “The Techie Bit” for anyone else who is looking at interfacing kdb+ with MS Azure storage options.
- Azure Files is a simple file share that is fully managed on the cloud
– Our client had a large history of JSON files which were uploaded for persistence
– Additional JSON files were produced and uploaded in batches during the day
– These were ingested into kdb+ to create a streaming data repository - Azure Blobs is Microsoft’s answer to cloud object storage
– Our client had unstructured datasets stored as individual objects (or “blobs”)
– The data was extracted and manipulated in kdb+ so that key information points were easily joined onto the tables generated from the JSON files - Azure Cosmos DB is a schema-agnostic, NoSQL database
– Our client had a process that that was continuously updating this dataset throughout the day with new incoming data
At this stage, most firms understand the benefits of moving some (or all) of their operations to the cloud so that they can take advantage of the cost savings, scalability, and flexibility that cloud computing offers. As part of any cloud migration strategy, firms should also take this opportunity to confirm that they are using the right technology – the availability of other choices and ease of implementation in the cloud settings offers a unique opportunity to rebalance solutions’ architectures if appropriate.
In this blog we present kdb+ and Microsoft Azure. We hope this will not only show how easy it is to deploy kdb+ into an Azure cloud platform but also how simple it is to interface with other technologies and services.
“The Techie Bit”
Accessing your Azure VM
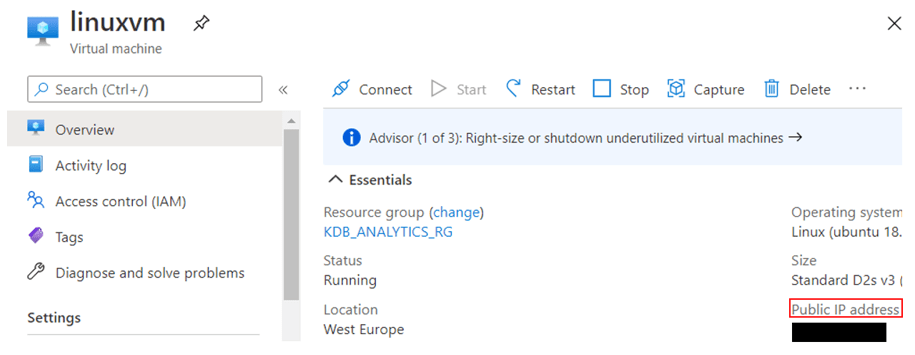
Get your VM’s IP address
From your virtual machine’s (VM) home page, go to the ‘Overview’ tab and find the Public IP Address is listed under the ‘Essentials’ section (see below).
ssh to VM
Use ssh and your identity file to get onto your VM:
ssh -i /path/to/mykey.pem username@vm_ip_address
Installing kdb+ onto your Azure VM
I had anaconda3 installed onto my VM which included Python 3.8.3. Next, I installed the Python packages for each MS Azure storage option:
$ pip install azure-storage-file-share

$ pip install azure-storage-blob

$ pip install azure-cosmos
Get kdb+ and embedPy
Download the free 32-bit kdb+ version here and download the embedPy package from here.
Copy both zipped folders to your VM using scp and your identity file:
scp -i /path/to/mykey.pem folder.zip username@vm_ip_address:/some/directory
Unzip the folders on your VM and follow the README instructions to finish their installations. You will need to chmod 777 the {w|l}32/q after the copy to run the executable.
Get rlwrap
Rlwrap (readline wrapper) gives you readline functionality and is very useful when using the q console – get it by running:
$ sudo apt-get update -y

$ sudo apt-get install -y rlwrap
Useful aliases
These are some aliases that I set in my .bashrc when using kdb+ with rlwrap and/or embedPy (feel free to change the directories to your own):
export QHOME='/home/kdbadmin/q_linux'

alias q='rlwrap /home/kdbadmin/q_linux/l64/q'

alias qpy='rlwrap /home/kdbadmin/q_linux/l64/q /home/kdbadmin/q_linux/p.q'
Useful environment variables
First, to interact with our Files/Blobs storage account, we need to get the connection string. From your storage account, go to Settings Access keys, and your connection string(s) will be listed beneath each key (only one string is needed).
Get your Cosmos DB connection details as well from Settings Keys (only need URI and Primary Key):

Copy these keys and and set them as environment variables:
export AZURE_STORAGE_CONNECTION_STRING="your_storage_connection_string"

export AZURE_COSMOS_URI="your_cosmos_db_uri"

export AZURE_COSMOS_KEY="your_cosmos_db_key"
If you’re just playing around with this today, you could always just paste these strings directly into your q/Python code instead of creating environment variables – but this is a much cleaner way to do it (plus they’ll always be there in future to use again).
Accessing Azure Storage Data from kdb+
Microsoft have written several client libraries for Python that allow users to manage their blobs/files in their storage account as well as query Azure Cosmos DB. For the scope of this blog, we will focus on downloading and reading data from each of these containers and converting their data into kdb+ tables.
To allow q to communicate with Python, we need to load embedPy into our q session. This can be done either by using the qpy alias from earlier or loading embedPy manually:
q)l /home/kdbadmin/q_linux/p.q
Next, load the Python libraries to interact with Azure Storage:
q)p)import os

q)p)import json

q)p)from azure.cosmos import CosmosClient # for Azure Cosmos DB

q)p)from azure.storage.blob import BlobServiceClient # for Azure Blobs

q)p)from azure.storage.fileshare import (ShareClient, ShareFileClient) # for Azure Files
Set your account variables (enter your own share name):
q)p)connection_string = os.getenv('AZURE_STORAGE_CONNECTION_STRING')

q)p)share_name = '{your_file_share_name}'

q)p)share_client = ShareClient.from_connection_string(connection_string, share_name)
q)p)connection_string = os.getenv('AZURE_STORAGE_CONNECTION_STRING')
q)p)uri = os.environ['AZURE_COSMOS_URI']
q)p)key = os.environ['AZURE_COSMOS_KEY']
Now, we will break down how to pull the data from these MS Azure containers into Python (using embedPy), and then we will show how to easily convert them into kdb+ tables.
Files
Using the Python library for Azure Files, get a list of files from your storage account and pull their data:
// Python: Get list of files

q)p)files_and_dirs = list(share_client.list_directories_and_files())

q)p)files = []

q)p)for x in files_and_dirs: files.append(x['name'])
// Python: Get data from files

q)p)file_data = []

/ NOTE: collapse this into one line if running from q) prompt

q)p)for x in files:

file_client = ShareFileClient.from_connection_string(connection_string, share_name, x);

data = file_client.download_file();

cleaned_data = (data.readall().decode('utf-8-sig')).strip();

file_data.append(cleaned_data)
Blobs
Using the Python library for Azure Blobs, get a list of blobs from your storage account (enter your own container name) and pull their data:
// Python: Connect to Azure Blobs account

q)p)blob_service_client = BlobServiceClient.from_connection_string(connection_string)
// Python: Get list of blobs in container

q)p)container_name = 'validdata'

q)p)blobs = []

q)p)container_client = blob_service_client.get_container_client(container_name)

q)p)blobs_list = container_client.list_blobs()

q)p)for blob in blobs_list: blobs.append(blob.name)
// Python: Get data from blobs

q)p)blob_data=[]

/ NOTE: collapse this into one line if running from q) prompt

q)p)for blob in blobs:

data = blob_service_client.get_blob_client(container=container_name, blob=blob).download_blob();

cleaned_data = (data.readall().decode('utf-8-sig')).strip();

blob_data.append(cleaned_data)
Cosmos DB
Using the Python library for Azure Cosmos DB, use query_items to query your database (enter your own database and container names):
// Python: Connect to Azure account

q)p)client = CosmosClient(uri, credential=key)

q)p)database_name = 'kdbcosmos'

q)p)database = client.get_database_client(database_name)

q)p)container_name = 'iotdata'

q)p)container = database.get_container_client(container_name)
// Python: Get data from container items

q)p)item_data = []

/ NOTE: collapse this into one line if running from q) prompt

q)p)for item in container.query_items

query='SELECT * FROM iotdata',

enable_cross_partition_query=True):

item_data.append(json.dumps(item))
Converting Python data into kdb+
Now that we have pulled data from three different Azure sources, we need to move the data from Python memory into q memory. We do that using .p.get and, since all the data was of JSON format, we can convert it into kdb+ tables using .j.k:
q)rawFileData:.p.get[`file_data]`

q)fileRes:.j.k each rawFileData
q)rawBlobData:.p.get[`blob_data]`
q)blobRes:.j.k each rawBlobData
q)rawCosmosData:.p.get[`item_data]`
q)cosmosRes:.j.k each rawCosmosData
That’s it! The data is now loaded into three kdb+ tables, where we can process them further to make them more readable and useable, enforcing sensible schemas and joining the datasets to enrich them for our users.
Find out more information on Version 1’s partnership with Microsoft and MS Azure here.